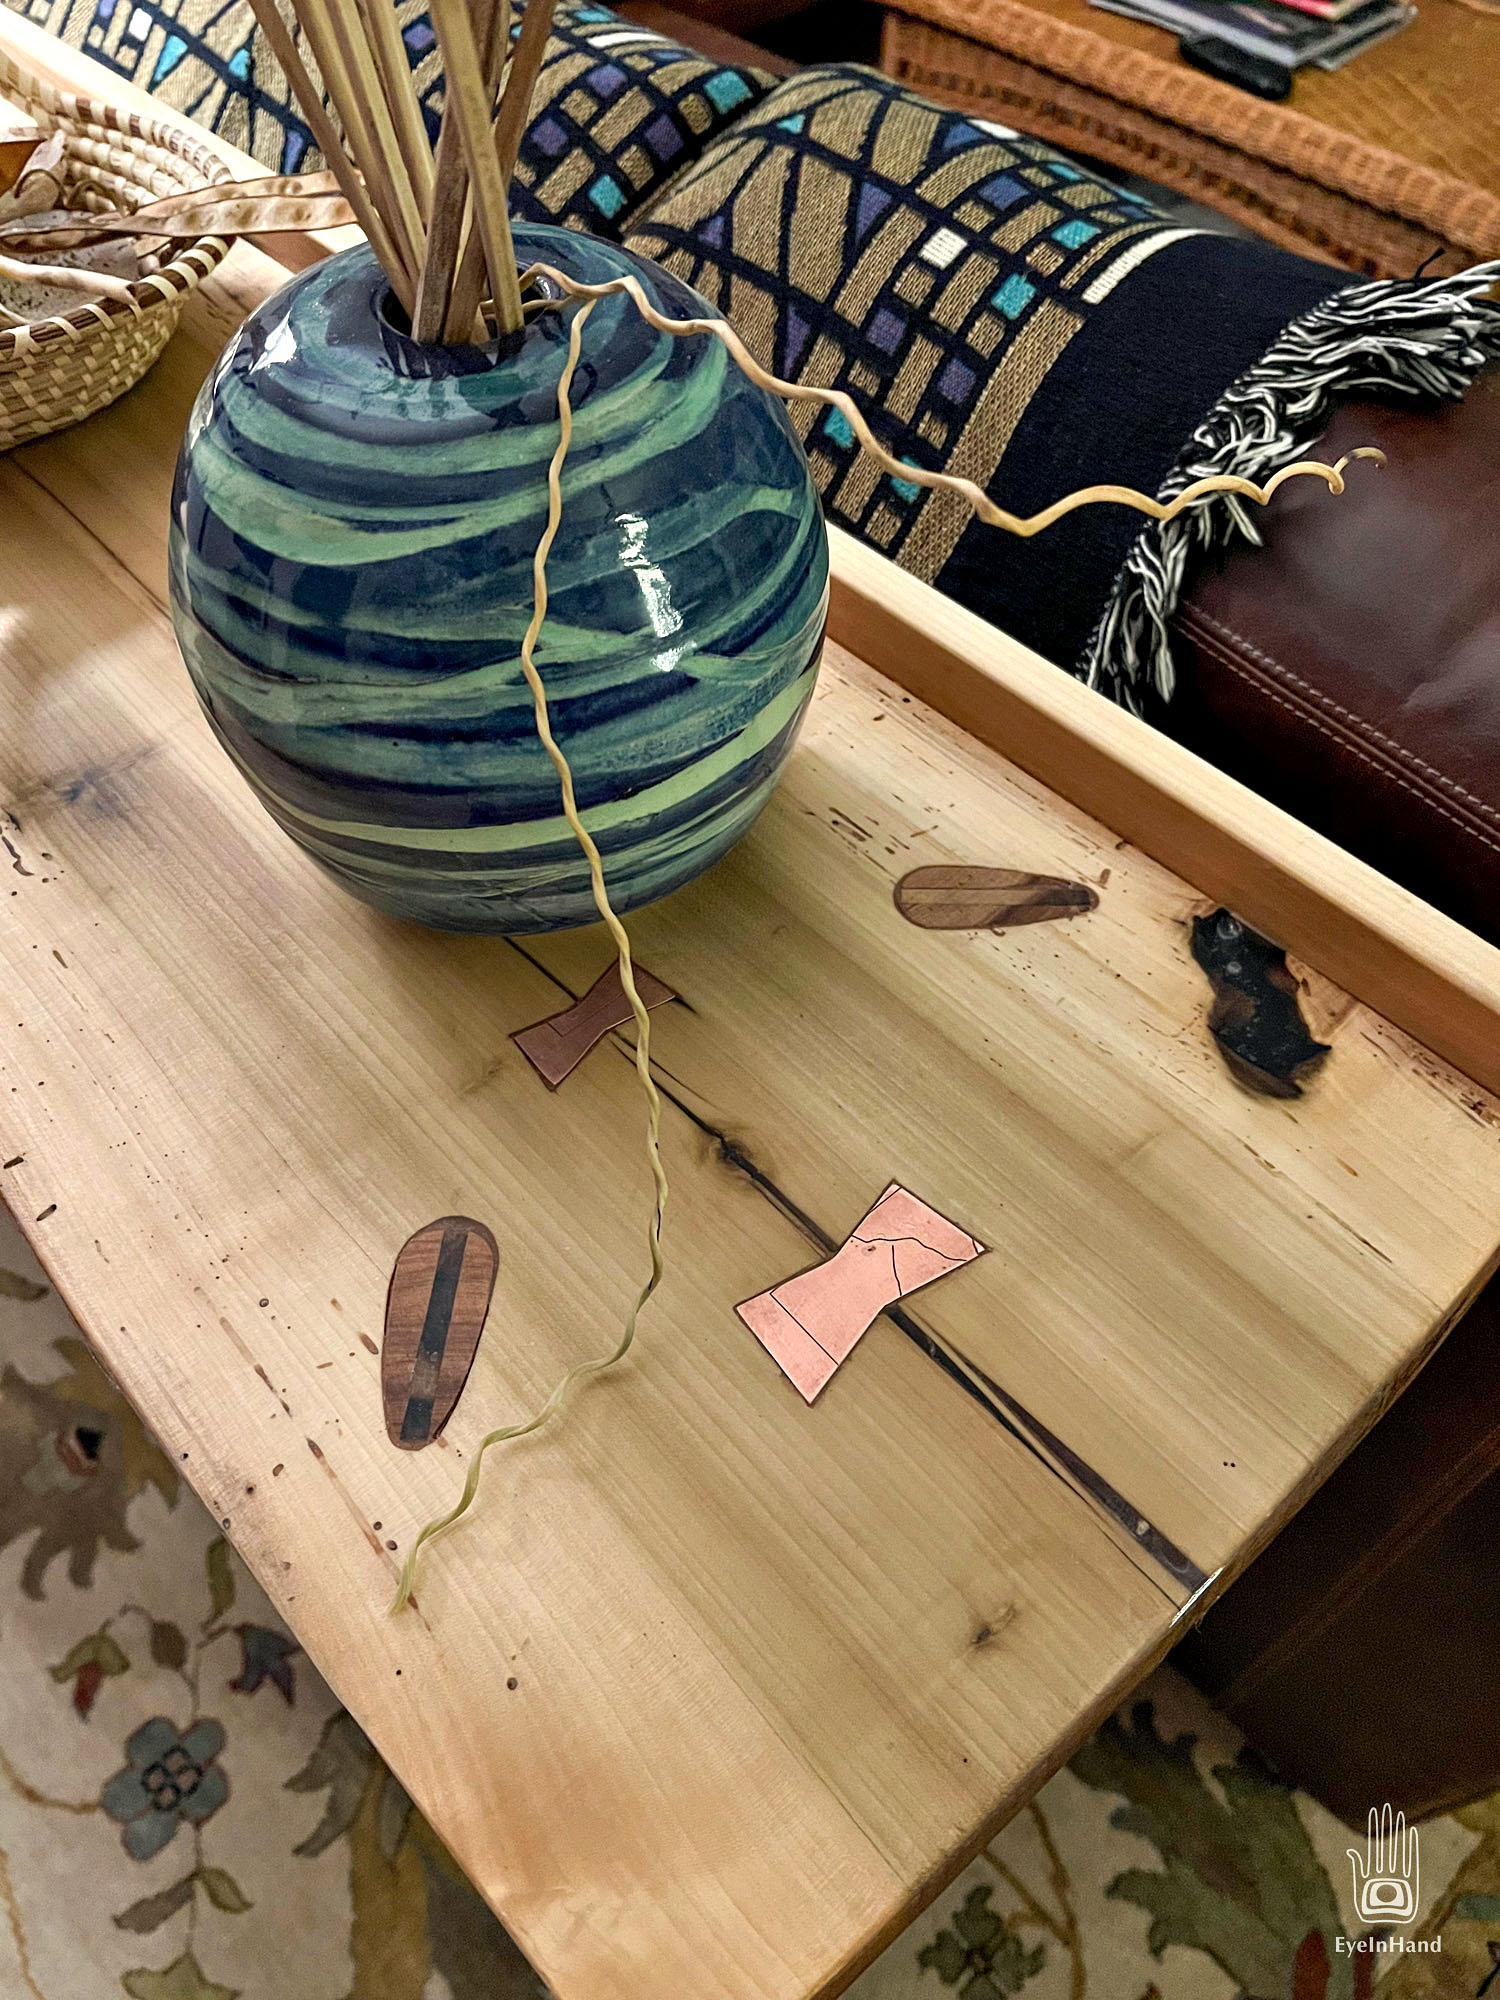

The axe handle console table is done. I may add a coat of varnish when the epoxy cures; but probably not necessary.
It’s a fun art project, with a story.
The Slab Story
Long ago, a friend had an ancient beloved tulip poplar on his land, which had to be taken down. Hundreds of years old, it was easing slowly into the afterlife. He would have let nature take its course, but the old tree towered over their house. So he and a buddy had to cut it down. It fell with a crash that shook the whole house like thunder. They limbed and lopped the hulking leviathan until they tired of it, then hauled off what they could with a farm tractor, leaving behind the massive column of the main trunk.
He, like me, was a porch sitter. The big log laid in view from said porch. Time passed. Thrifty by nature, he realized it was a shame to waste such an impressive piece of wood. And he was sentimentally attached to it. Besides, it was too big to move, even with a tractor.
Many evenings he pondered what one might do with such a fine piece of wood, that big old log laying out in the yard.
John and I worked together then. We often egged each other on in various ill-advised endeavors. So, inevitably, he thought of me. I said I wasn’t interested, had a boat building project already. But every couple of months he’d bring it up again, with fresh enthusiasm and some new idea of what I might make with it. He convinced himself that no one in the world could make anything worthy of this old tree but me, and he spent a couple of years gently trying to convince me of the same. And eventually did. I was renovating the kitchen, and needed an interesting piece of wood for a bar top. This might do.
It wasn’t until I arrived, with nothing but a trailer and a come-along, fully intending to bring the log home, that John mentioned it was too too heavy to move with a tractor. He was known to leave out such practical details. In the intervening years it had settled into the ground. It wouldn’t budge. At all. No way. And furthermore, after all those years of John’s pondering, the wood had continued to decay, getting punky and worm eaten. But there it lay, and here I was.
I suggested the only option was to cut out a couple of big slabs with a chainsaw, and maybe take those. His face fell, but he conceded to the new plan. I went back for the saw. After a couple of hours of chaining, ankle deep in sawdust, sweating and dirty, I had one big slab of poplar – 8 feet long, over 3 feet wide, and 8 inches thick. Even that was too heavy for the two of us to lift, we had to drag it onto the trailer. I got it home, wrestled it into the shed, and left it.
Years later, when we started the kitchen remodel, I divided the slab again into two 4 inch smaller slabs. The widest one, from the center, was split in two and became a countertop and bar, which turned out nice.
That left the narrower outside piece, still in the shed. Where it stayed for 20 years.

The Table Project
I got tired of moving that slab around the shed, but couldn’t bear tossing it out after all it took to get there. Next to it was a spare axe handle. Moving them both yet again, I noticed the handle shared a similar elegant S shape with the legs of a table T inherited from her grandmother.

Hmm. We could use a new table. Axes and timber go together.
I went to our local hardware store and got three more handles.

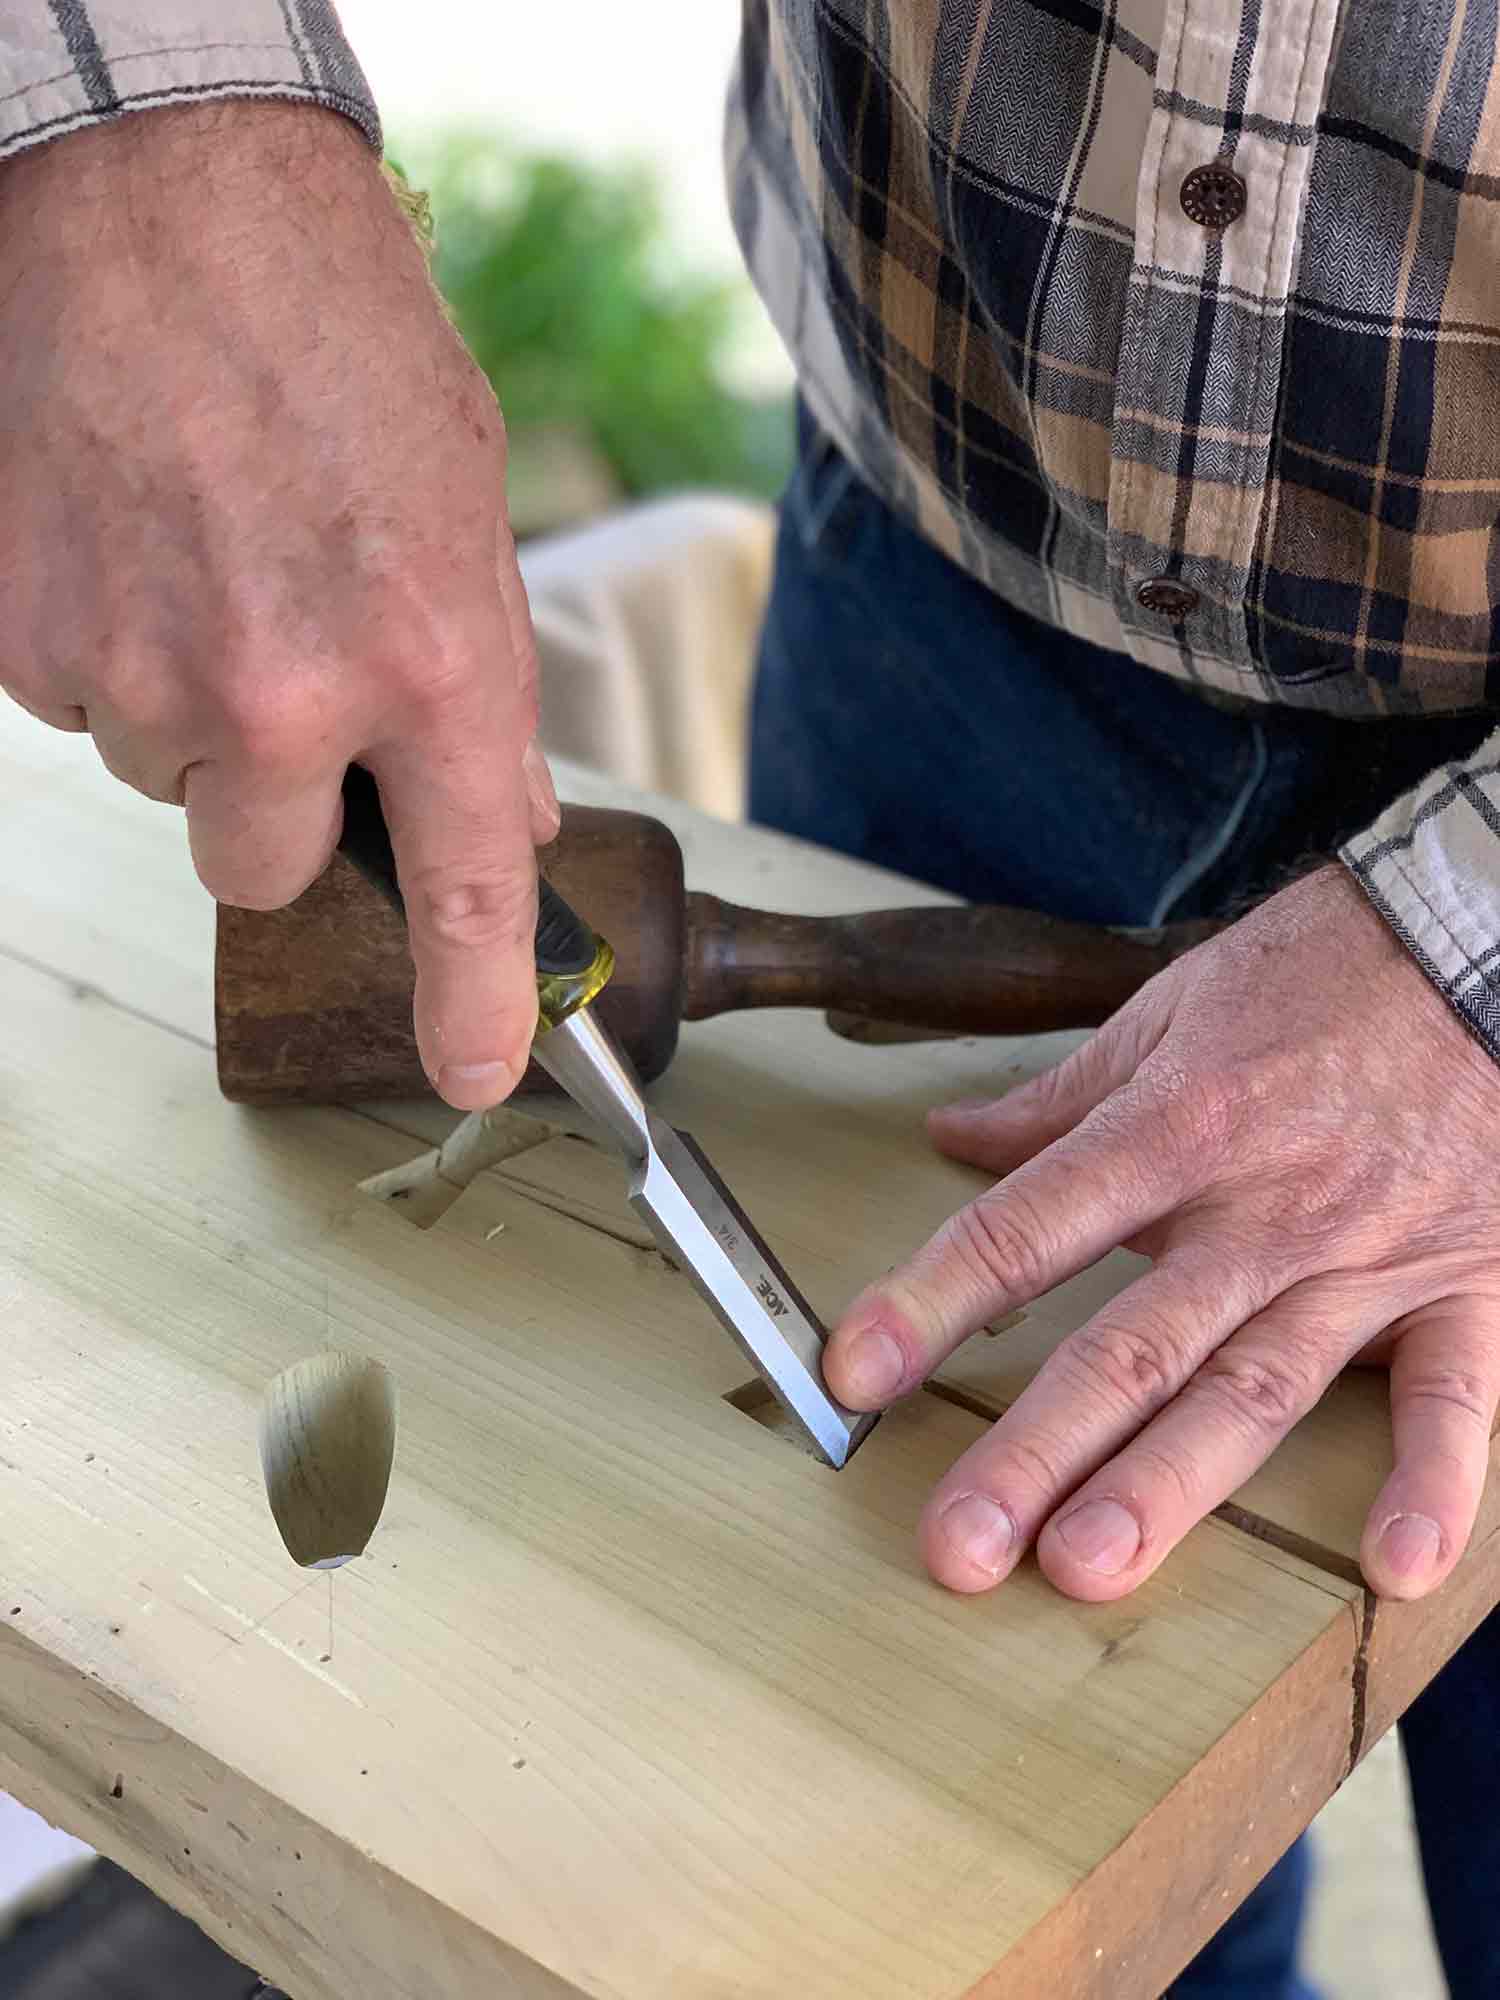
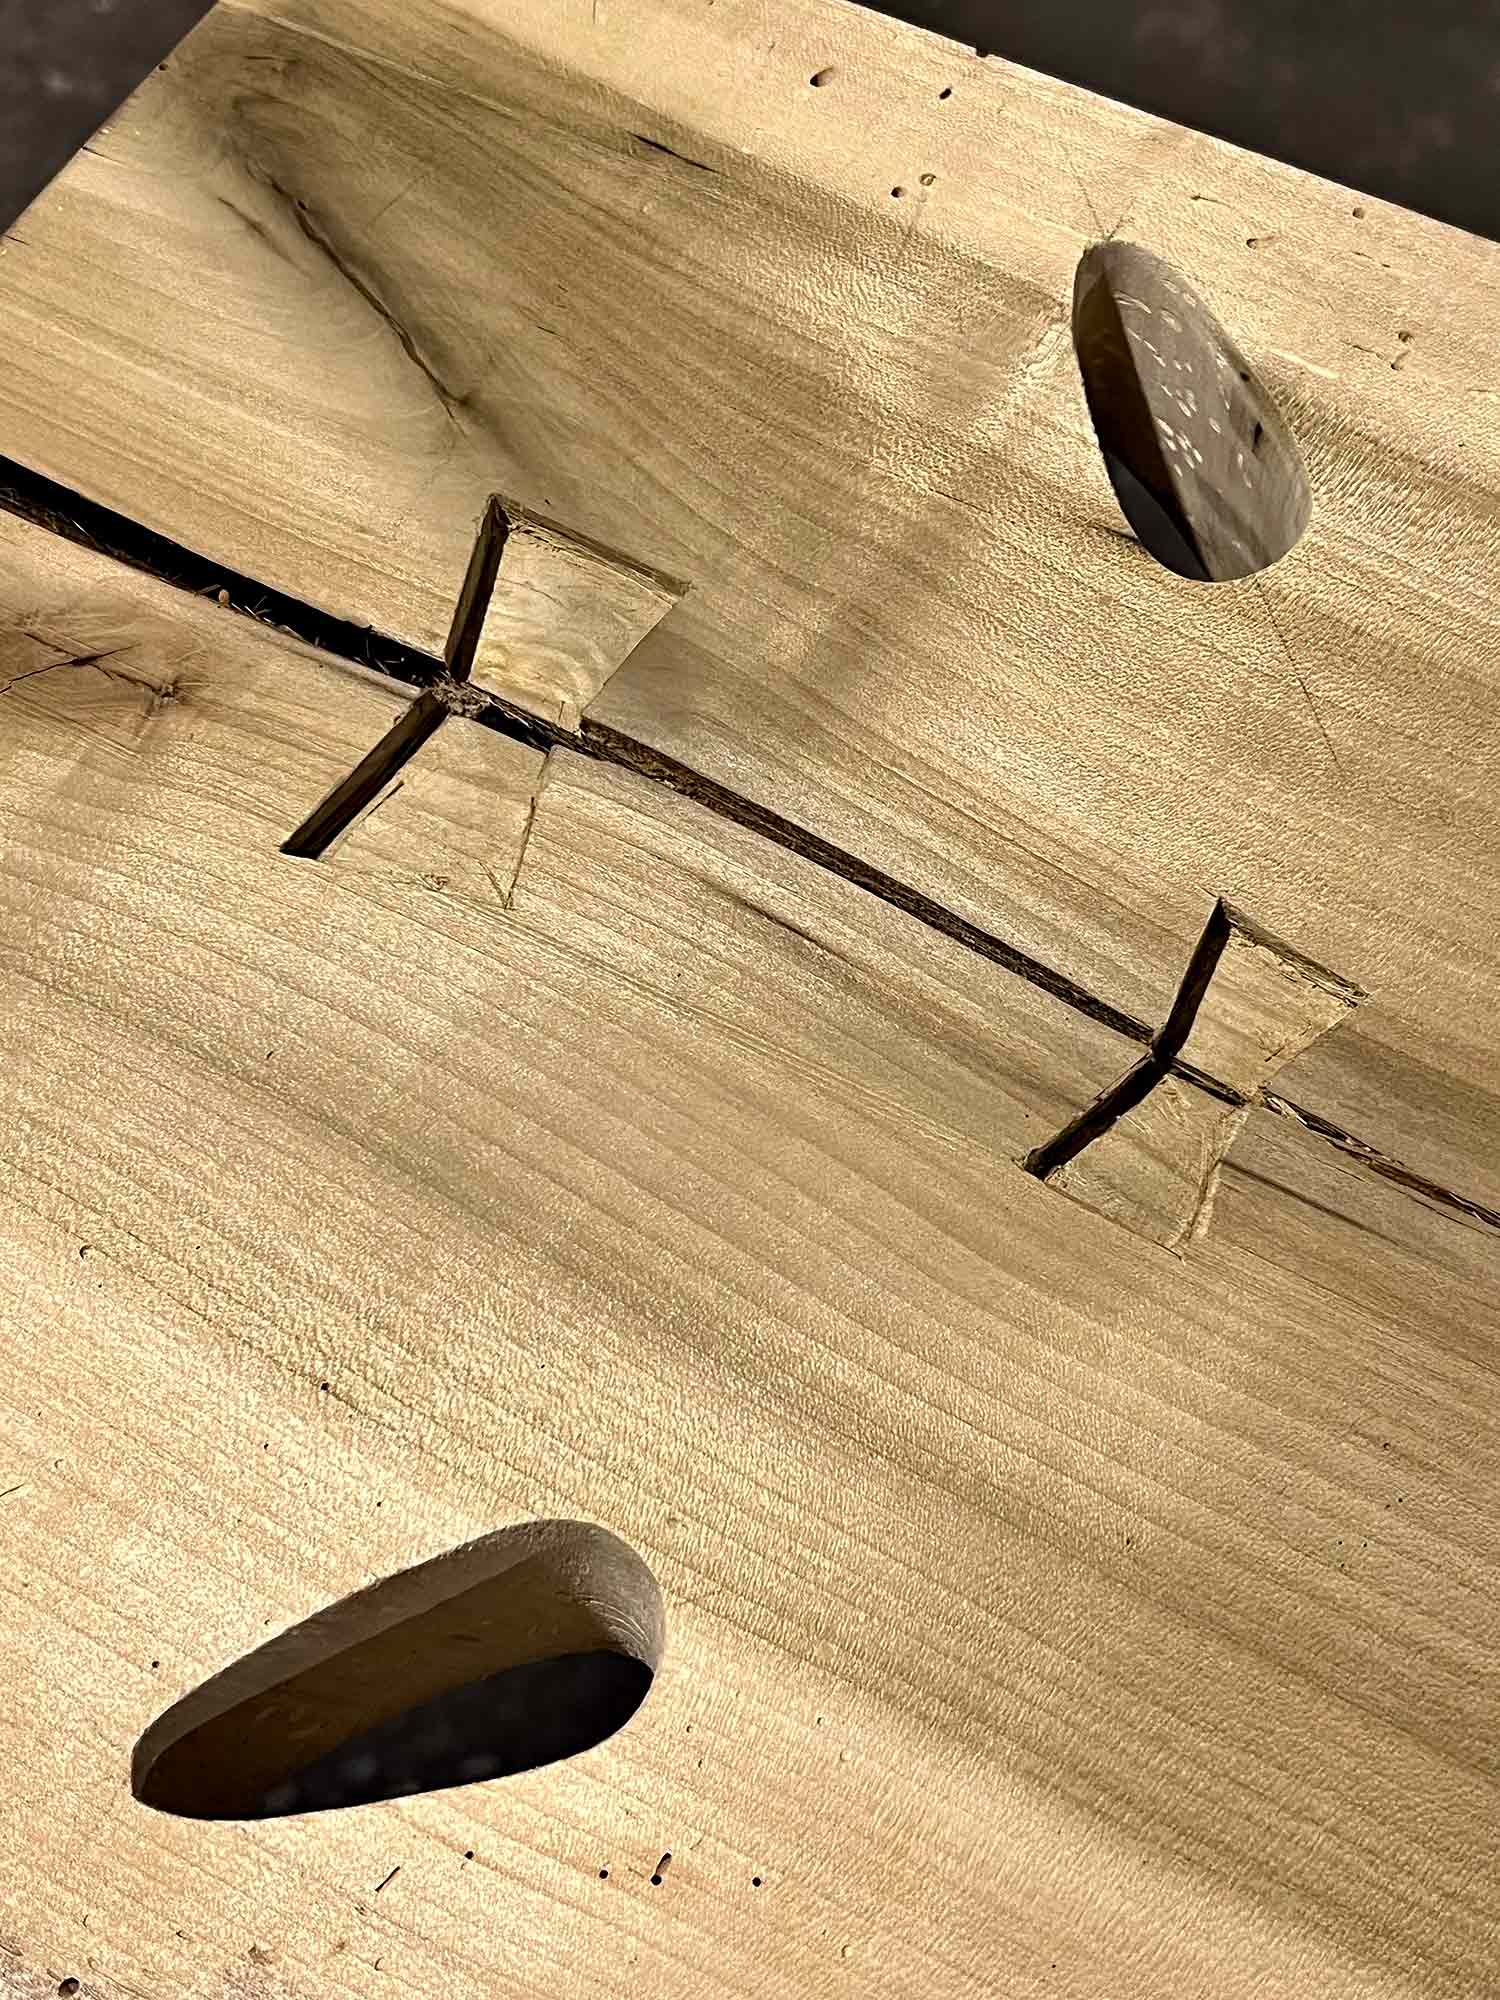
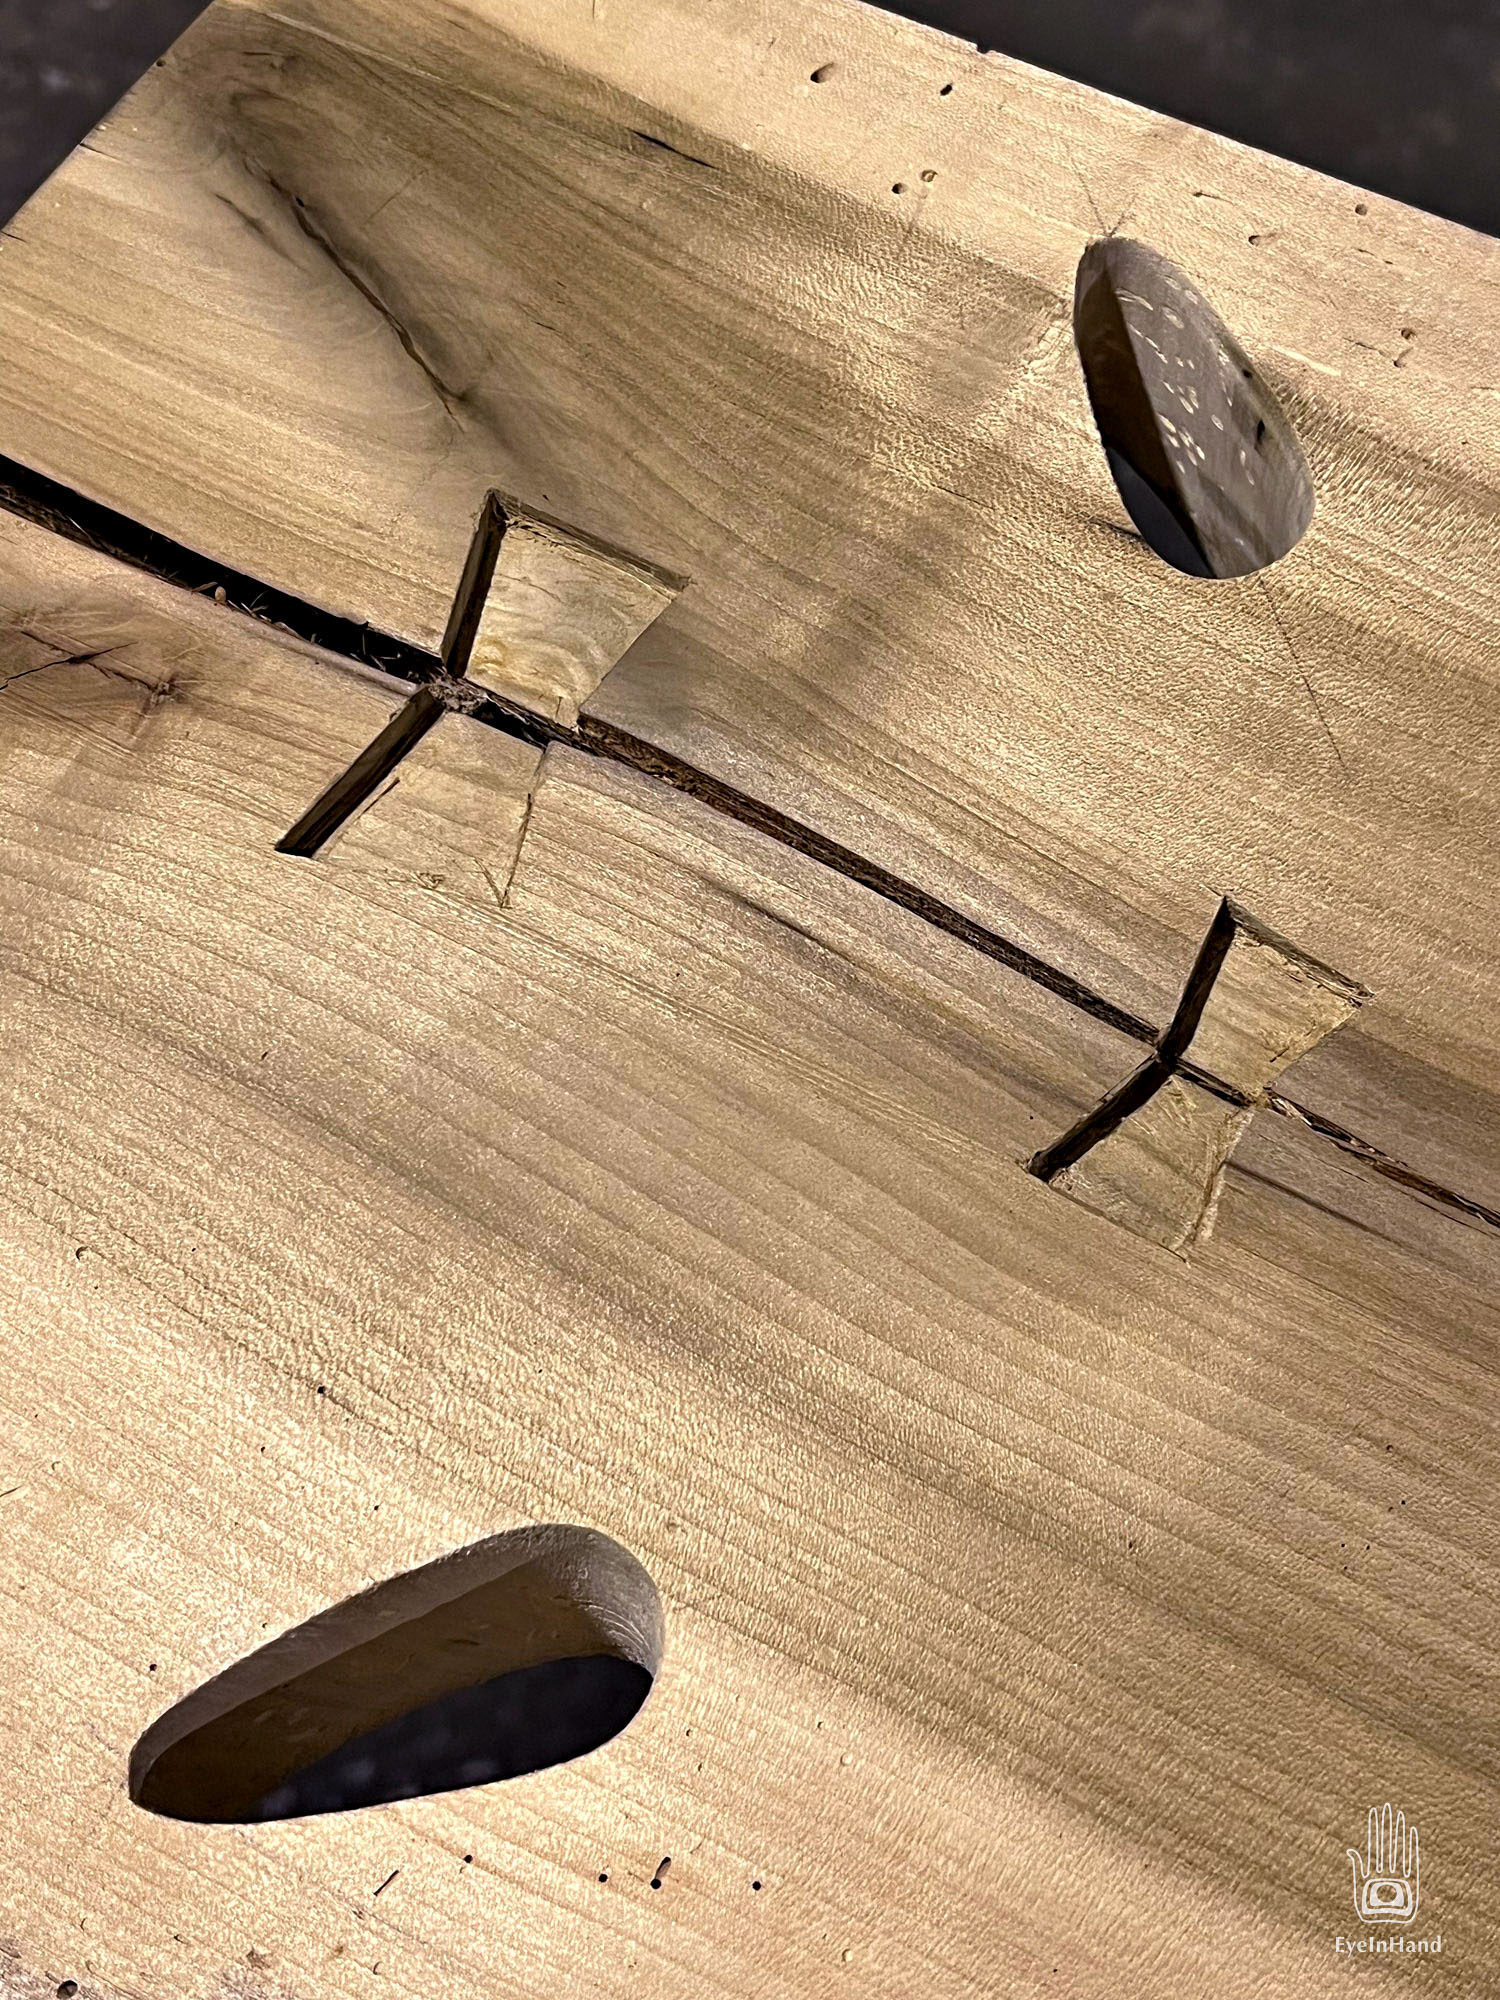
The challenge was to cut clean mortises for the tenons, the head of the axe handles. Axe head holes and handles for them are oblong egg-shapes. This means for a mortise you can’t just bore nice neat round holes. And worse, for the legs to set snug, you have to create a slight hip in the hole like this:
) (
When you drive in a wedge to spread the tenon, this hip gives it something to bite on, holding the leg tight.
So I had to trace the shape of the handles, bore out most of it with a drill press, then clean up the rest with a jigsaw and rasp files, and hope it would be close enough that any gaps would fill when glued.

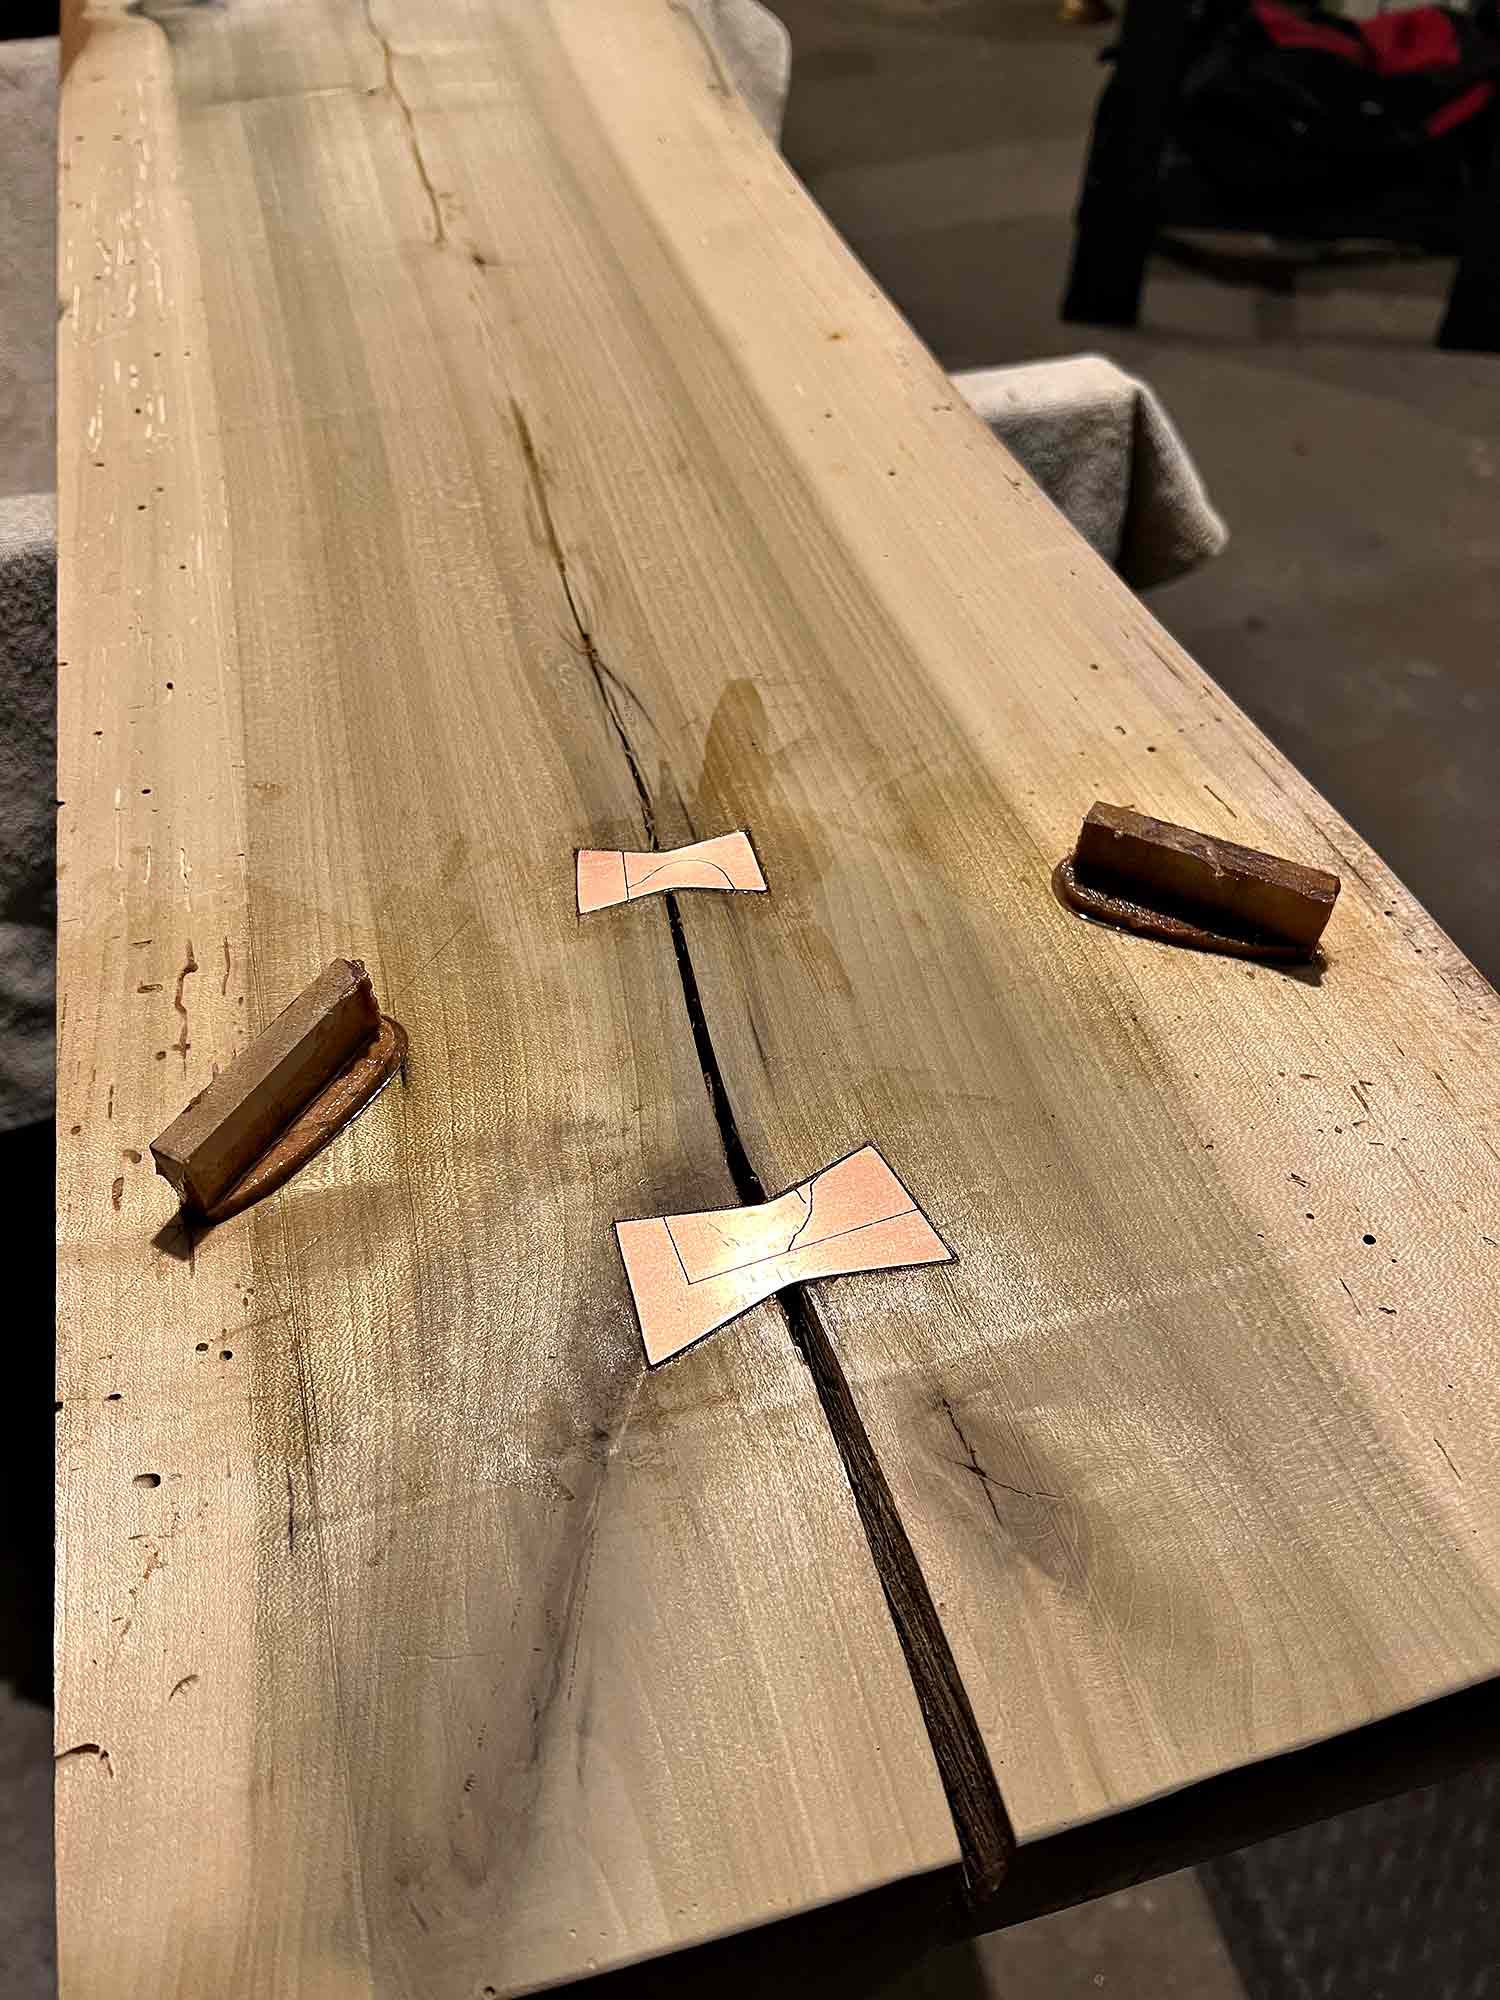
This last piece of slab was the least desirable section. It had splits in both ends that widened as the old log dried out, and deep gouges left by the chainsaw from when I just eyeballed the original cuts. I trimmed a limb stub off one end and that made the whole piece just narrow enough to run through a planer. Nothing to do about the worst chainsaw cuts, but one side came out clean.
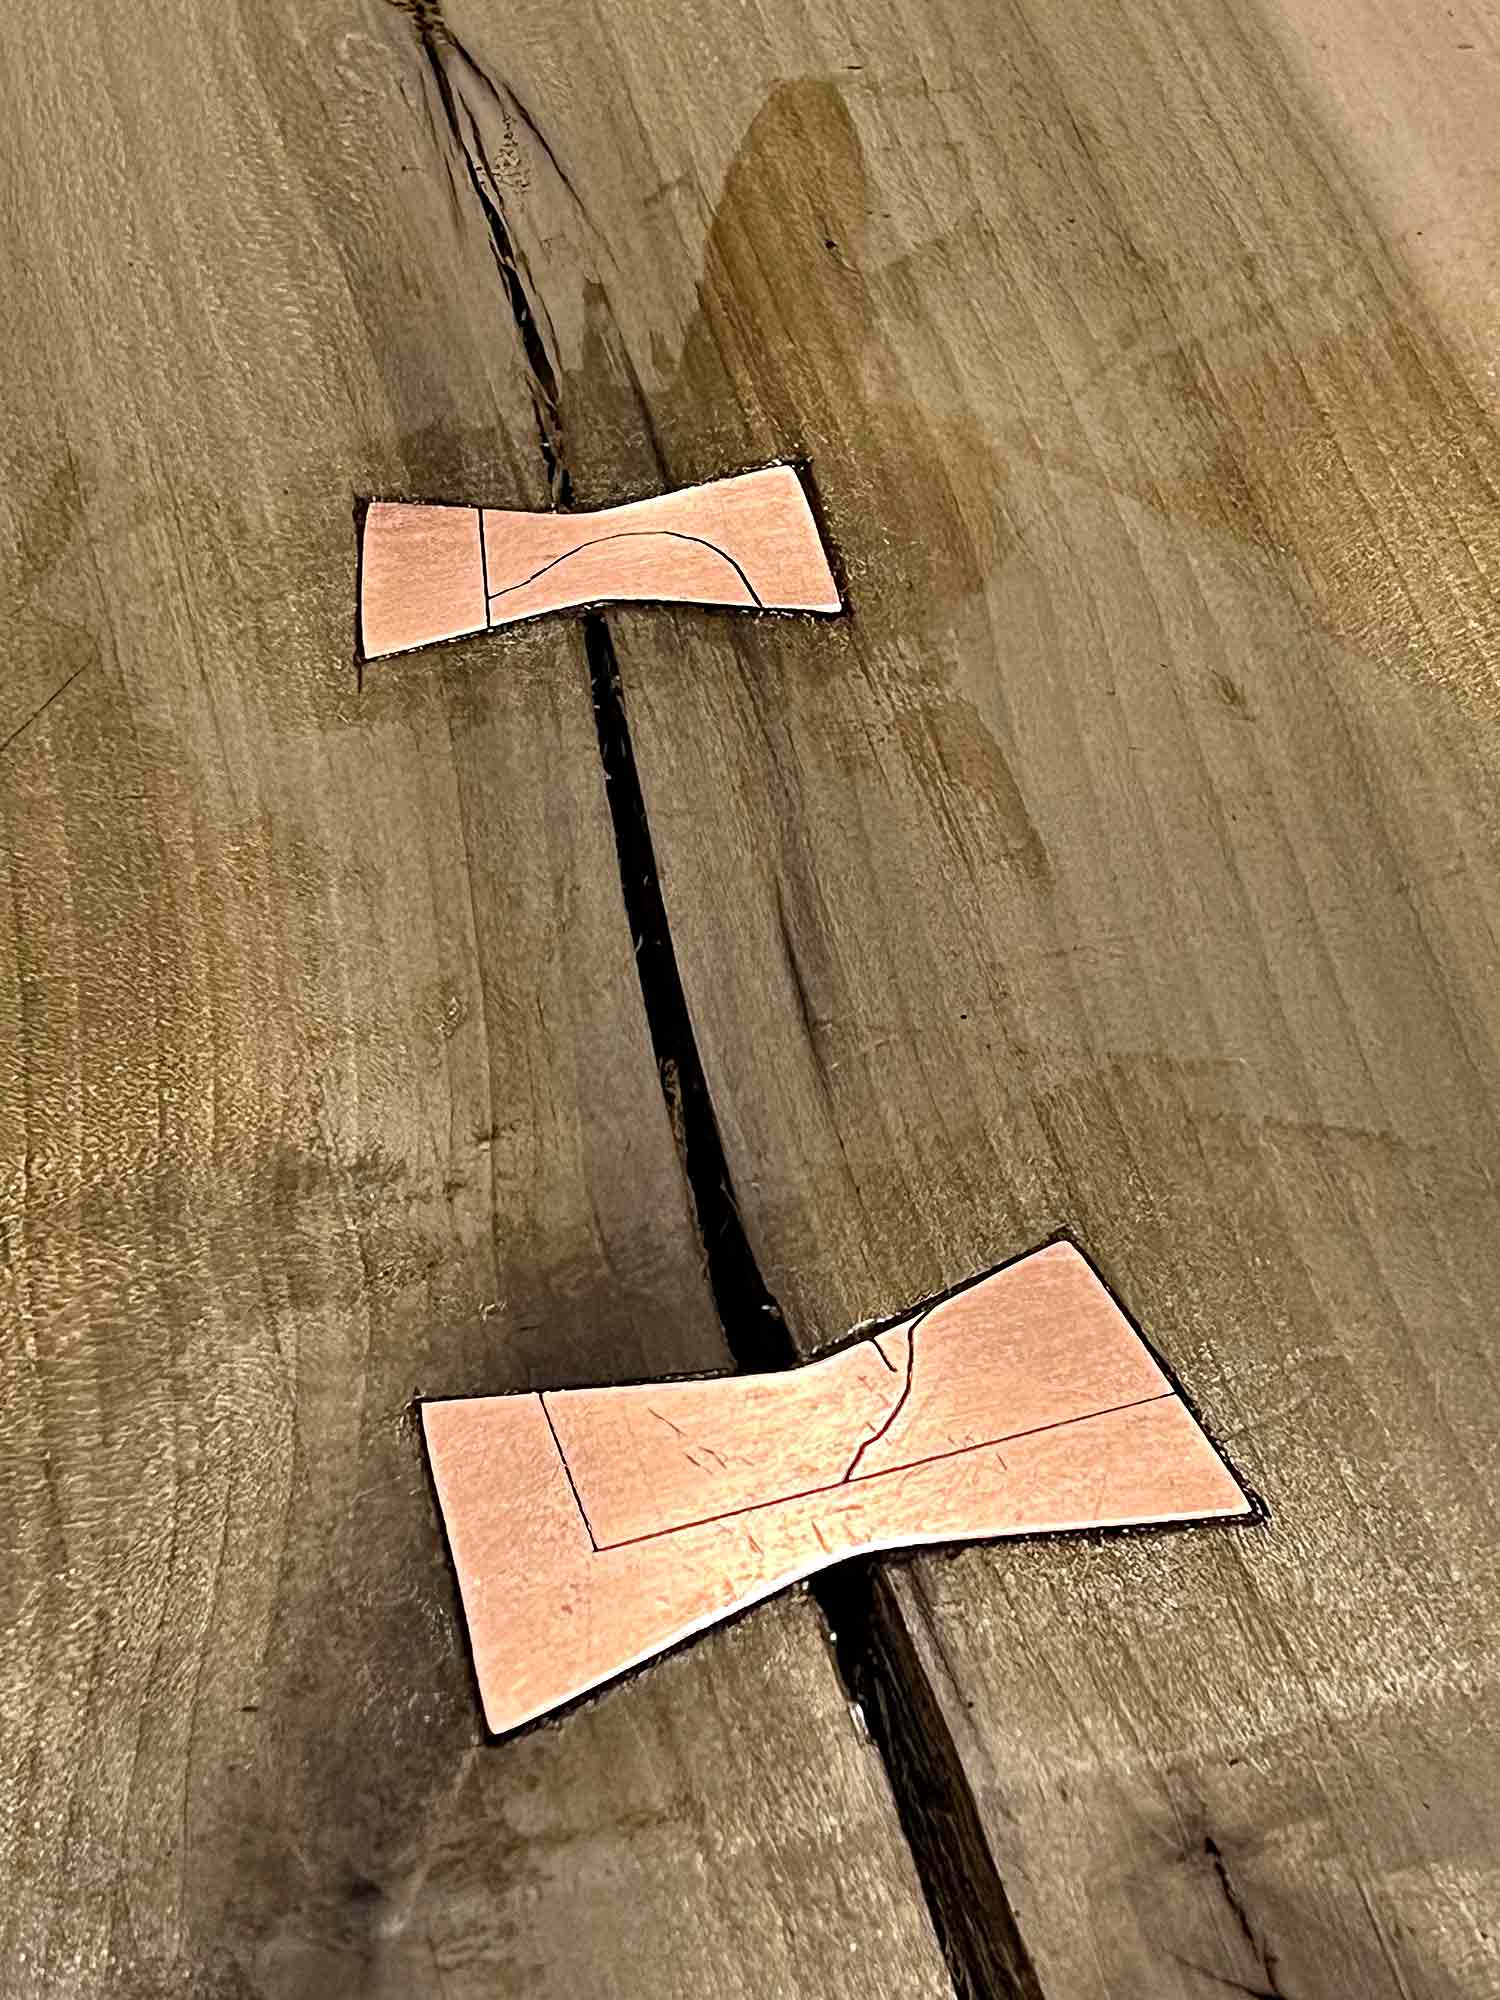
Next challenge is the cracks. These are big splits, with daylight showing all the way through the slab, running much of the length. Bowtie keys (dovetail keys, dutchman keys) would stabilize the cracks and can be sort of decorative on a fanciful art piece.

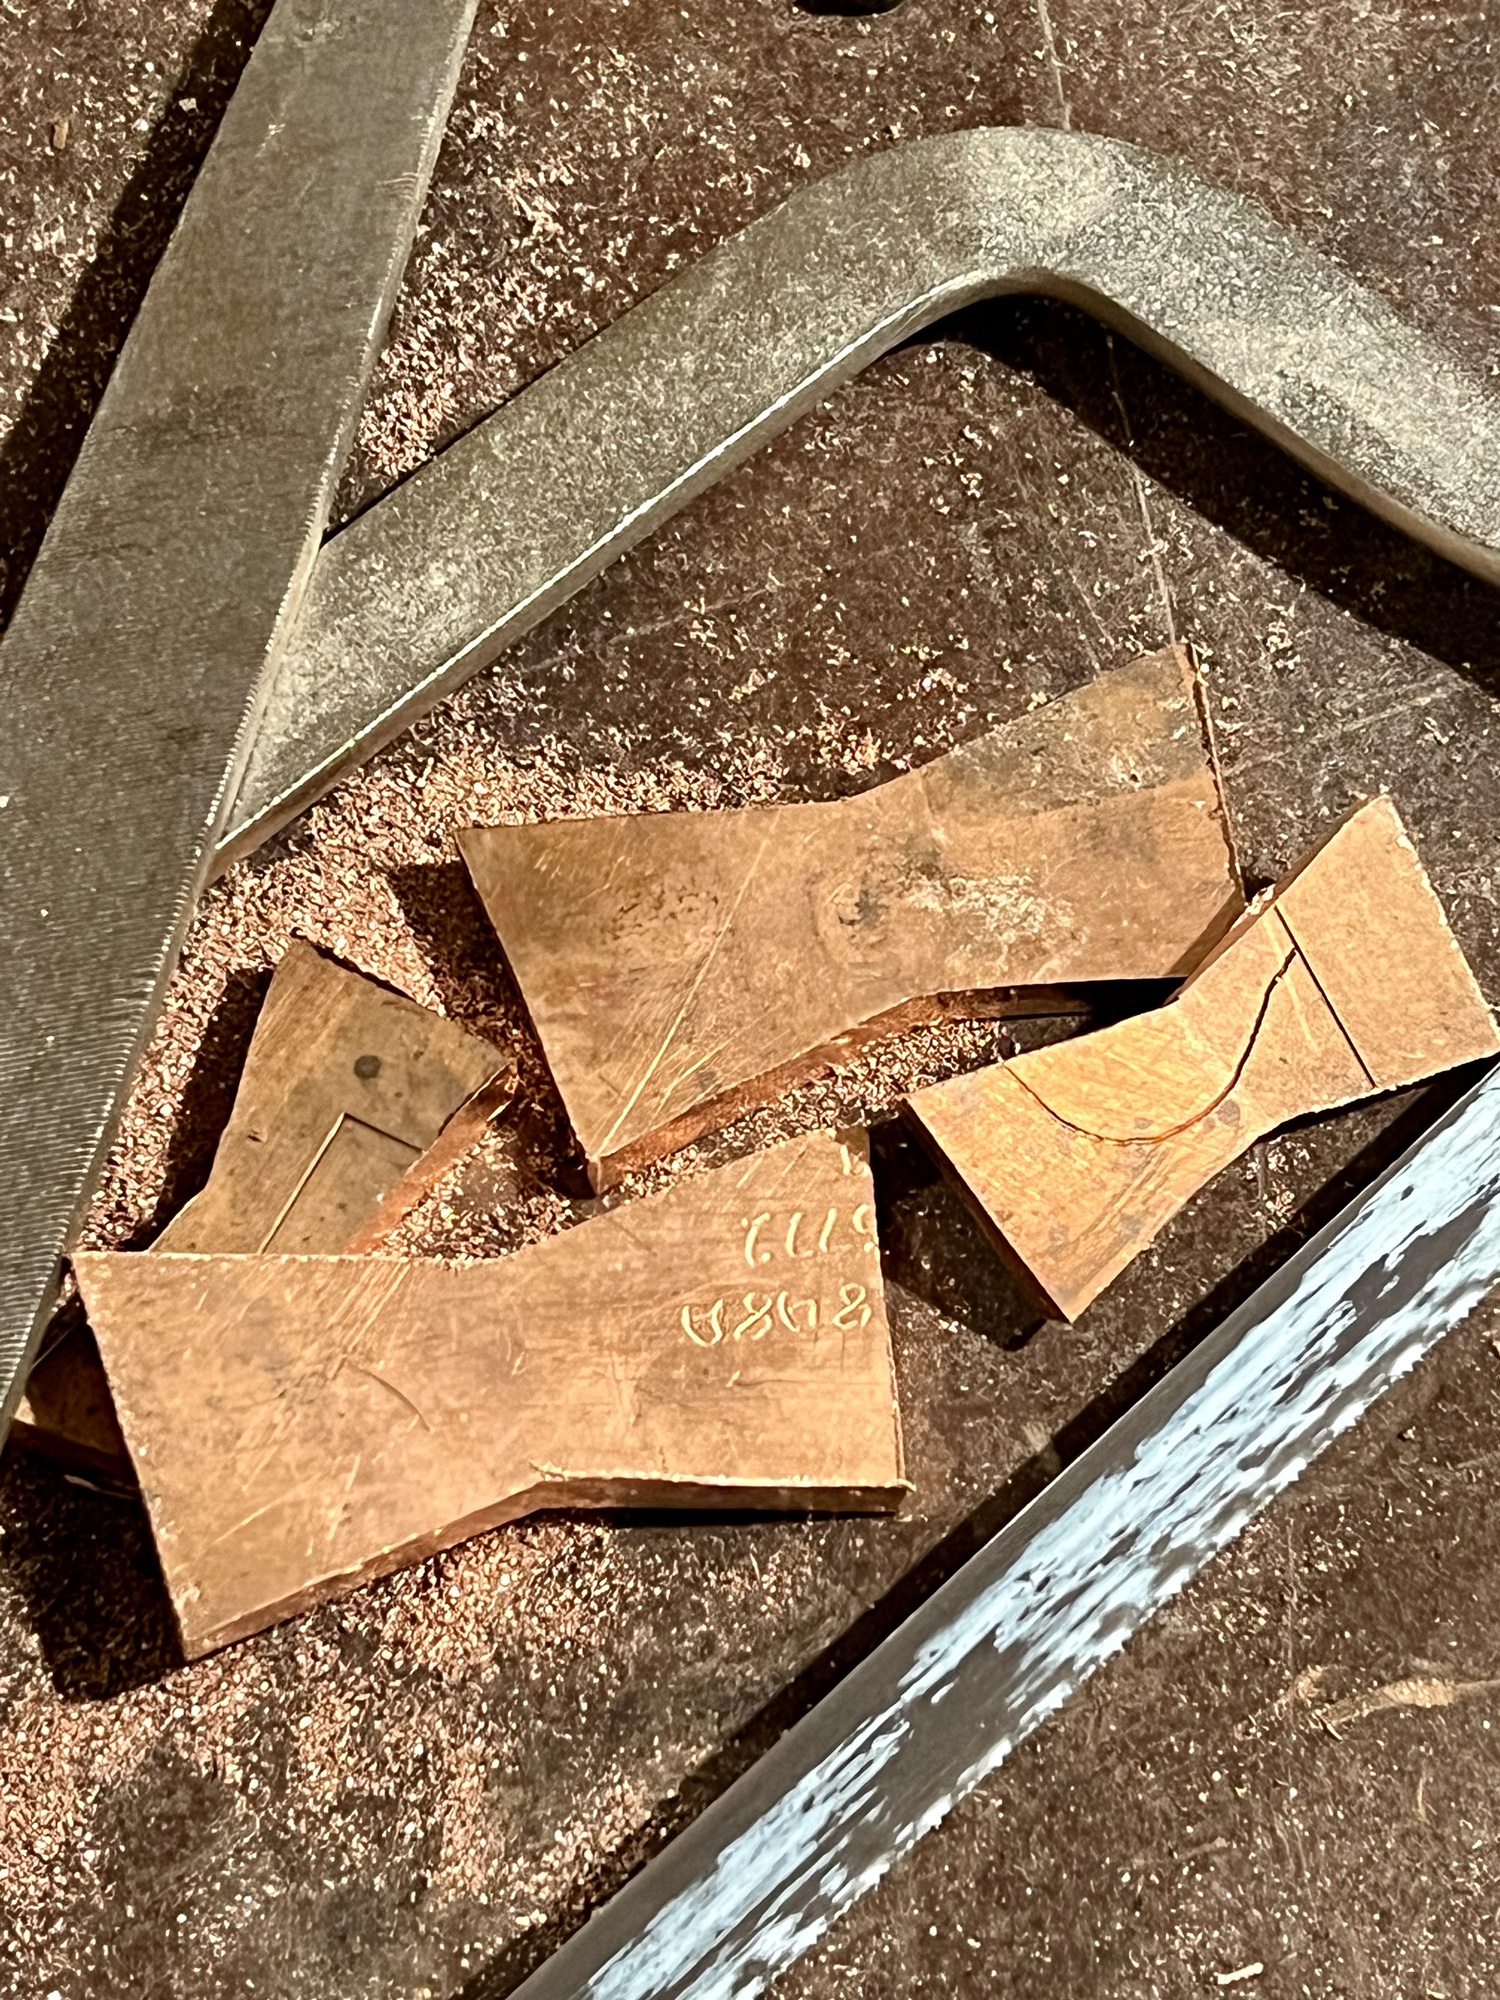
I had a plate of solid copper in the shop. It was the embossing plate from the cover of a literary collection we edited years ago, with the engraving of the original design. It was thick enough to cut into keys and be inset across the cracks. The butterfly shape has the same practical effect as hip-shaped mortises – they lock parts in place so they can’t separate.


Parts cut and shaped, holes drilled, inlays inset, the last step is to glue everything together and hammer the wedges home. There is only one shot at doing the legs. Once you drive in the wedges, there’s no getting them back out. All you can do is apply the glue before you start and hope for the best. I opted to use epoxy to give me a little more work time, and is better at filling gaps. Epoxy would be used for filling the splits anyway, so using it everywhere prevents weird shifts in the final finish.
I did the keys first so I could hammer those in tight. Then took a deep breath and did the legs. They worked out well, with only one or two places that needed filling with a paste of sawdust and epoxy.

A week later, I added a backsplash lip of poplar just to keep things from rolling off the back. This was screwed and pegged. Then I could clean up the residue from glue-up and apply the finish coats.

To fill the cracks, tape is applied to the top side, sealed tight, and while the table is inverted the cracks filled with epoxy, which flows down and flat against the tape. Bottoms and legs are just brushed on. A few days later, the assembly can be flipped over and the tape removed.


For the top, I used a trick I learned building the boats. You first spread a thin coat of epoxy with a squeegee, then roll out a sheet of mylar film and squeegee out the air bubbles.

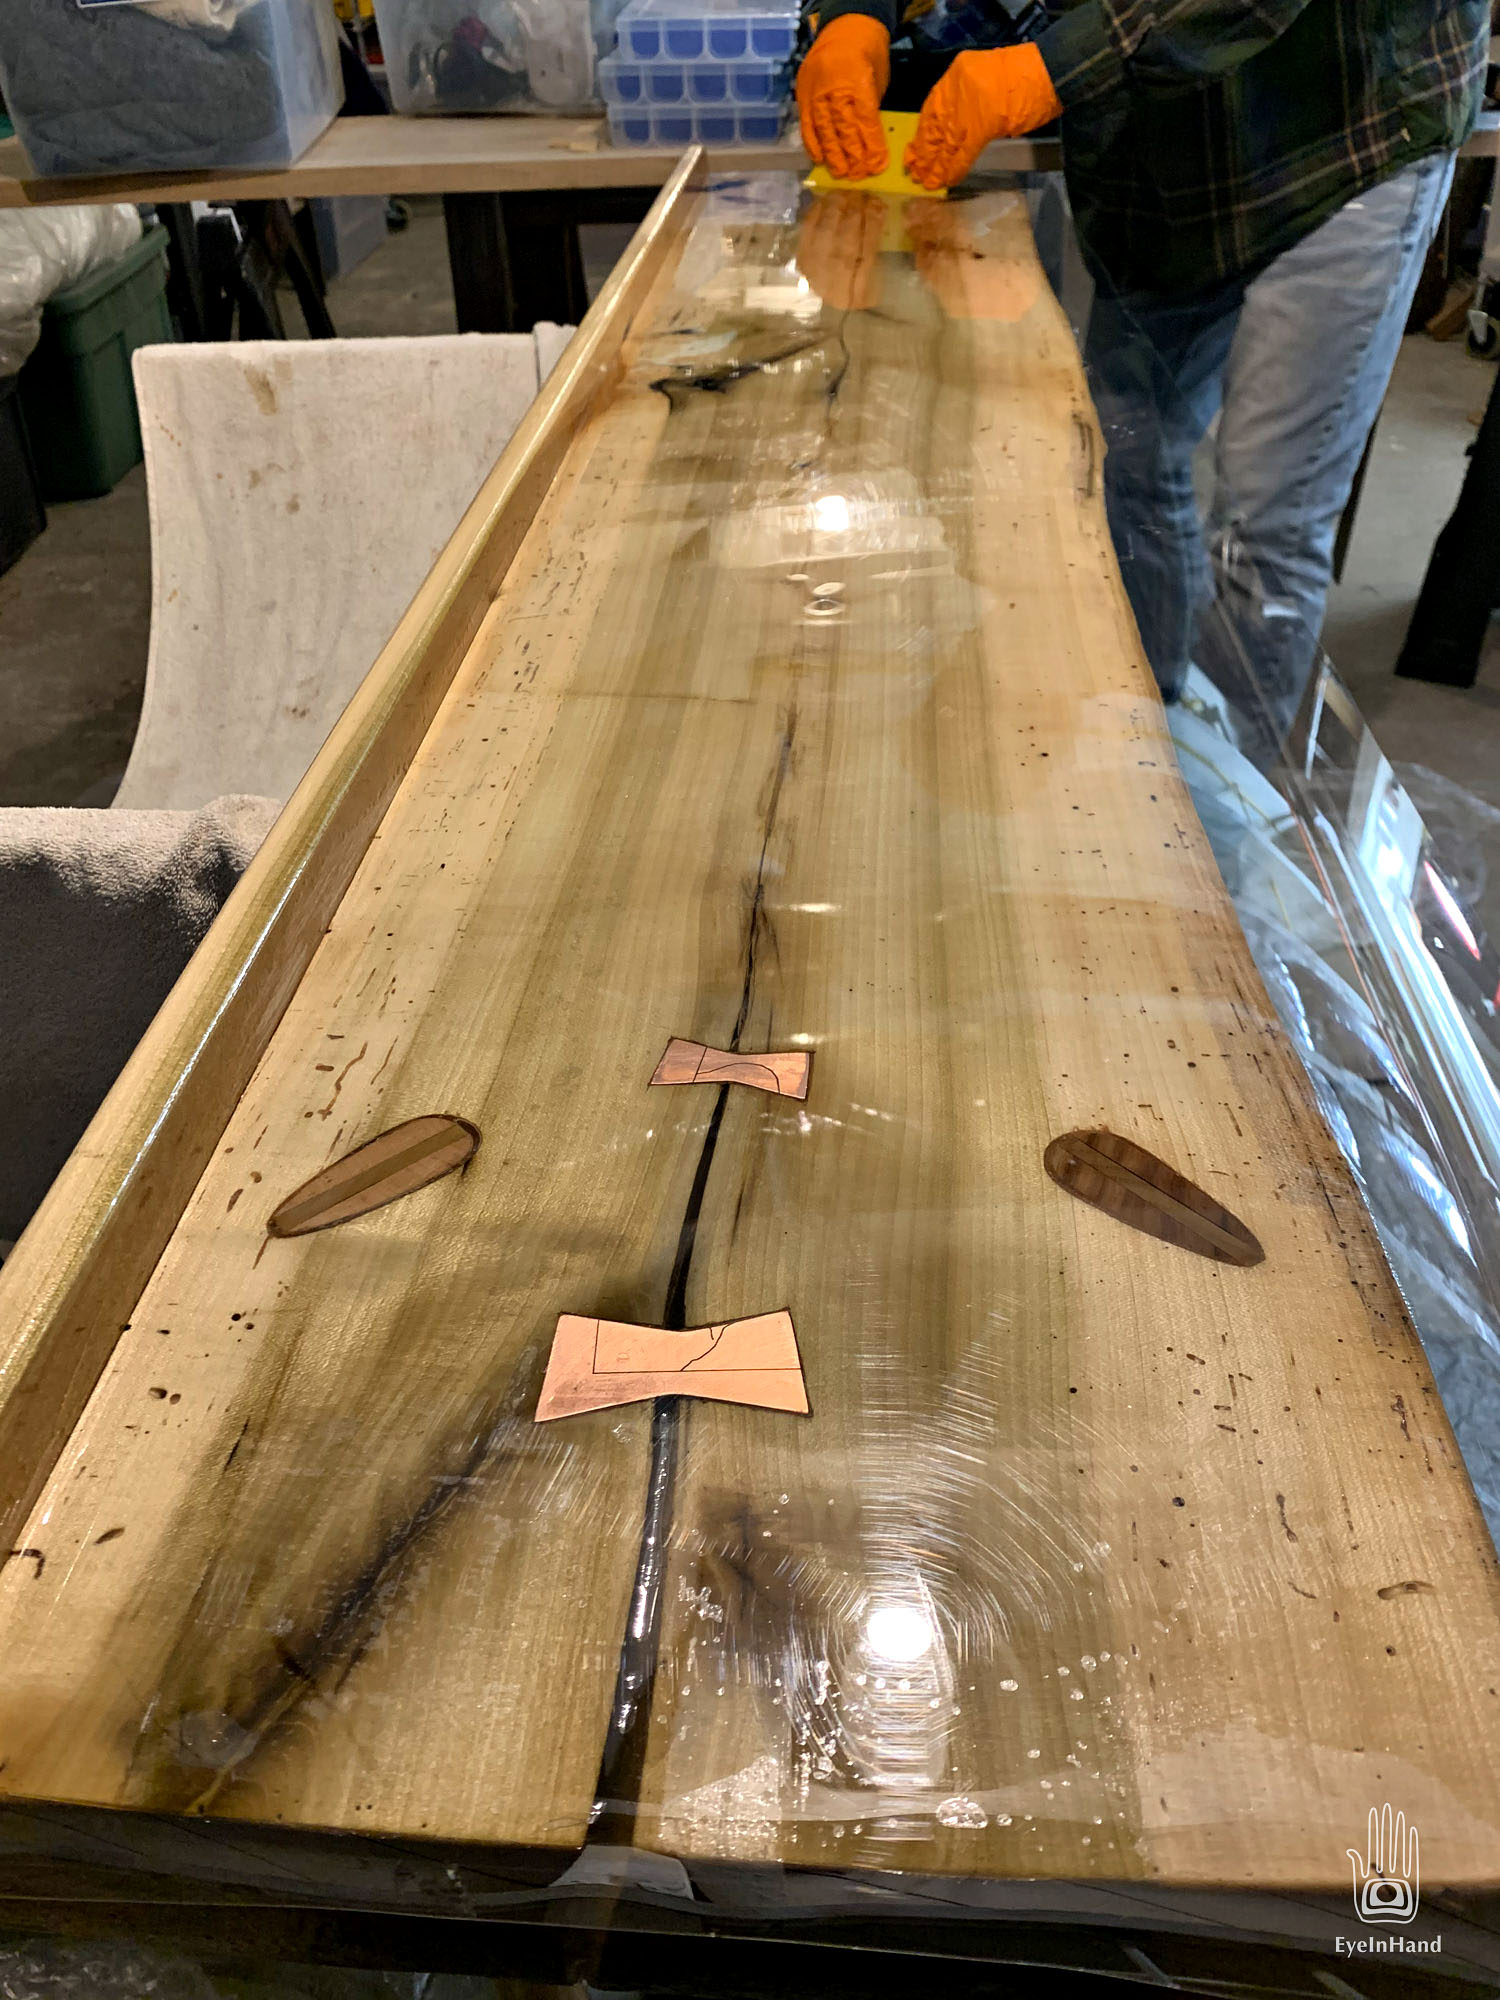


A day later, the mylar lifts off clean. This makes a thin, smooth layer of epoxy, perfectly flat. In fact, too flat and glossy for this rough project. So the last step is to buff the surface with 0000 steel wool for a more matte finish.

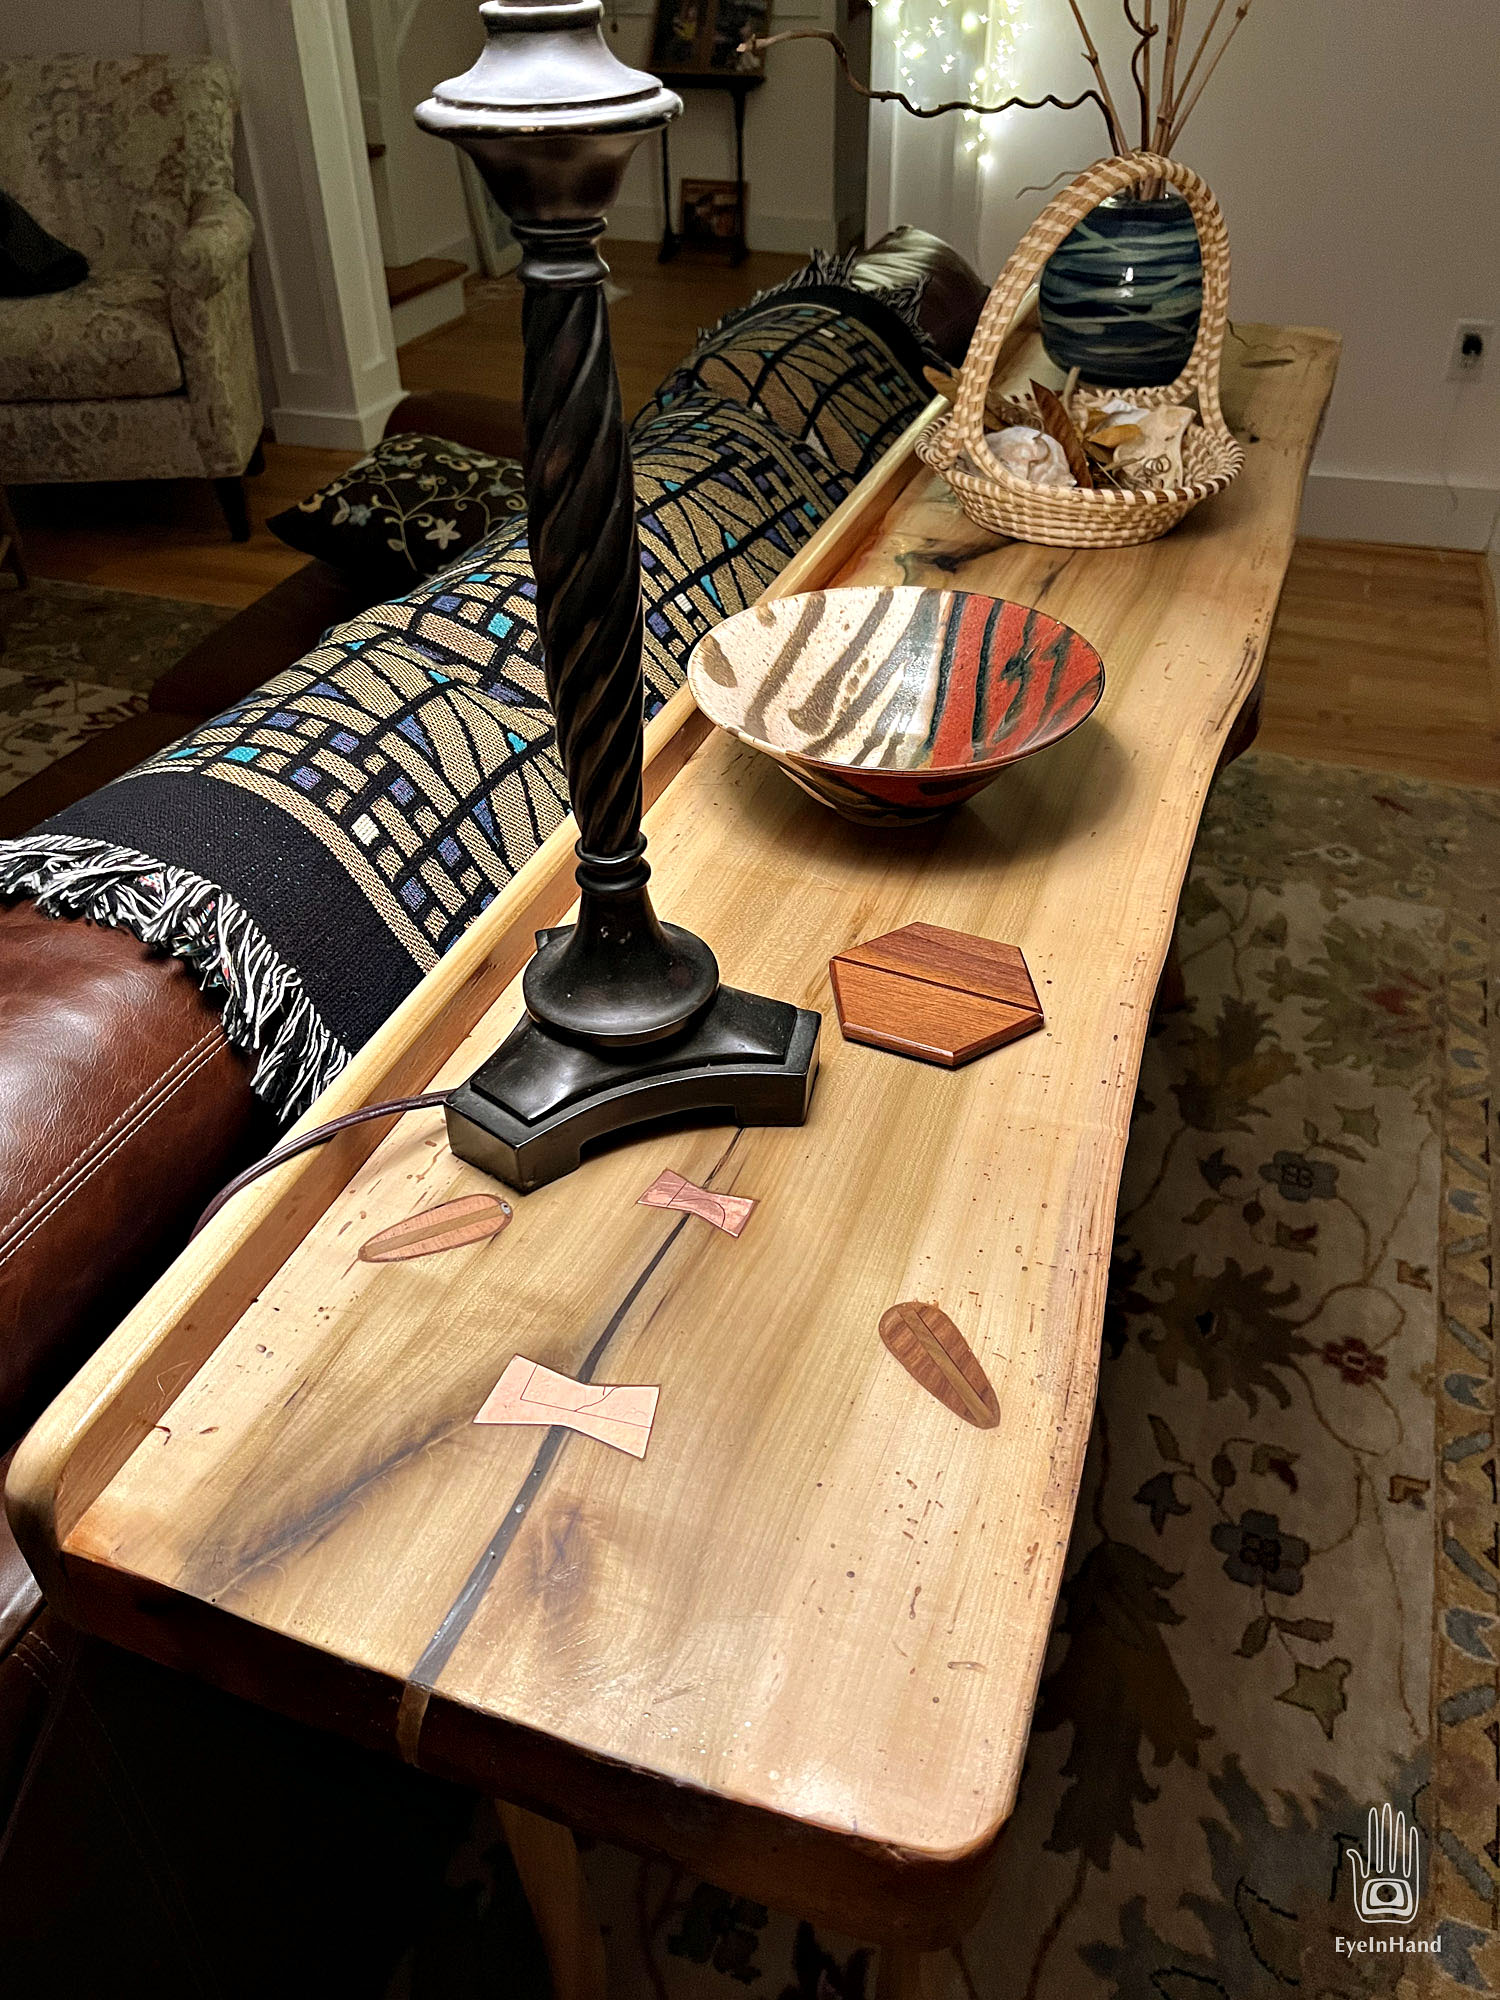
Overall it came out well. Looks like a greyhound on spindly legs. Weird enough to be fun.