When you have to be away from a project like this, even for a few days, it’s always difficult to get started again. When you’re away for a full month, returning to it is like walking into someone else’s shop. Tools that once came to hand automatically, without looking, now hide from me in plain view where I last laid them down. The sequence of building steps, once carefully arranged and ordered in your mind like planes queued up on a runway, becomes as confused as a flock of birds. What comes next? And then after that? I can’t remember. Even my notes need translation, like they were written by someone else.
I spent one whole day with a 14 foot cypress board laid out on the table saw, ready to rip, while I just walked around the shop – looking at everything, trying to remember, afraid to make the first cut on the sheer clamps, afraid I might be forgetting something important. In a way, you build a boat in your mind before you build it in wood, much like you create a piece of sculpture from a mental image. If you’re like me, when you don’t have that mental picture intact, you’re building blind. That’s especially true when the set of plans you have is more like guidelines than an actual set of instructions.
Here’s a good example of what I mean:
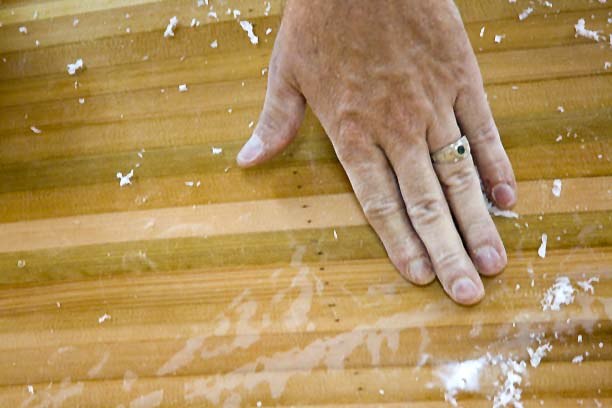
The interiors get a final finish coat of varnish when the boats are almost done. The epoxy will breakdown in sunlight without it. But the glossy surface of the epoxy needs to be roughed up with sandpaper for the varnish to stick. There are also some drips and sags to sand out. After an afternoon of dodging around the long sheer clamps, just laid on the hulls while thinking things over, it occurred to me it will be a lot easier to sand the interiors now, while they’re completely unobstructed, than later when they’re covered by the decks or behind a cage of framing. So, before mounting the clamps, the interiors got a thorough scraping and sanding. It will be a long time before I get to see the shiny again, but it will be much easier doing that step in this inverted order.
Shaving down the overlap seam.
Drips and sags shaved flat.
Here’s another one:
The plans call for the sheer clamps to be 1”x 1.5”. That’s all it says. It would be simple to assume you just rip planks of that dimension and fasten them in. When the decks go on later, they will need to make contact with the clamps all the way around the sheer, where they get screwed down to the hull. Well, the deck has a curved crown in it, which means it won’t lay on the sheer clamps at a right angle. In fact, the top edge of the sheer clamps needs to have a rolling bevel in it, since the angle of the deck changes from bow to stern. So you can’t just rip those boards to the exact dimensions. If you didn’t have a mental picture in your mind of how the deck meets the hull you wouldn’t think of that little detail until it was too late to change it. Not a disaster, maybe, but a hassle to compensate for later.
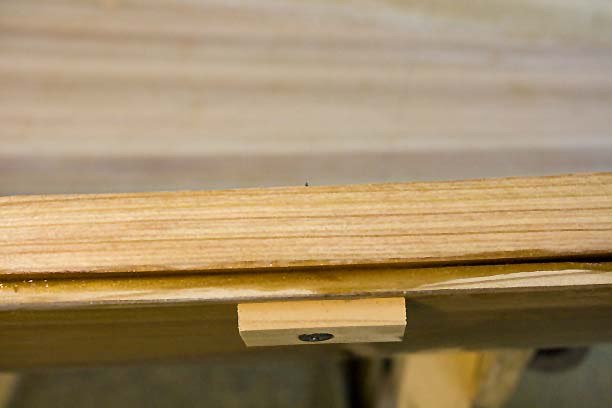
With that in mind, I took measures of the angles off the molds and cut the sheer clamps to the steepest angle – about 102 degrees – and mounted them slightly proud of the hull edge. A block plane will shave them down the to their final shape as the frames are added.
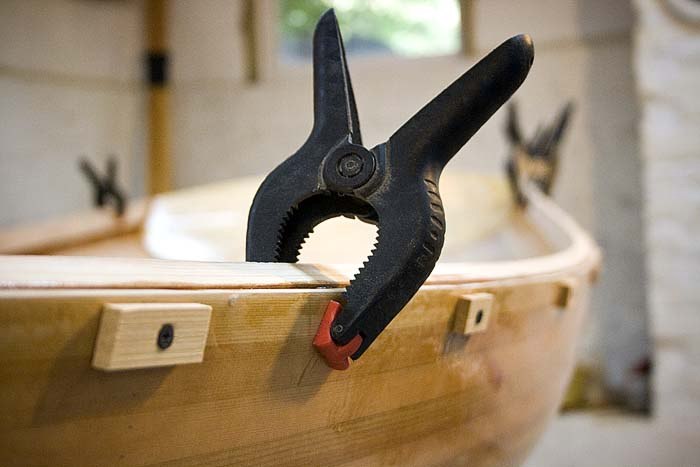
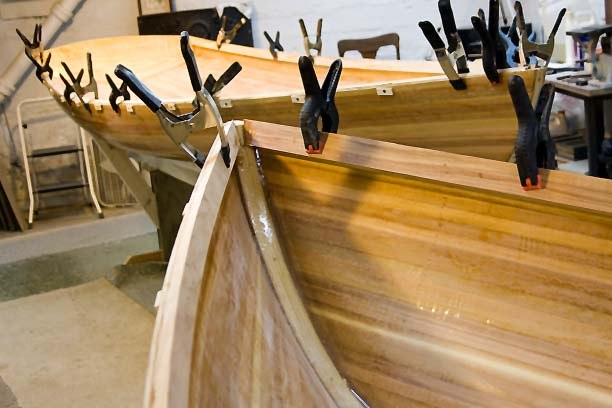
It takes lots of clamps to clamp the Sheer Clamps in place while the thickened epoxy glue sets. I used both temporary screws and clamps, since I didn’t have enough. Blocks protect the hull from the screw heads. Later, both frames and rub strips will be fastened through these same screw holes.
The plans call for the Sheer Clamps to be made from 1” thick Cedar. Some subtle twists and bends are required to fit them in place inside the hull, and it takes some persuasion to make a piece of wood that thick cooperate. These are then notched to seat the frame ends. I decided to make the fitting easier by laminating the Clamps in two thinner layers. The first layer is 3/4” Cypress, easy enough to bend in place. This worked well. Instead of notching that for the frames, I’ll fill in between the frames with a second layer of 3/4” Cypress, which will both lock the frames in place and stiffen the Clamps. This will also make a bigger target to hit with screws when mounting toe rails and such later.
 Sheer Clamp, beveled and proud.
Screwed and glued.
Sheer Clamp meets Transom
With these pieces in place, framing of the interior can begin in earnest.


Barry, I had difficulty visualizing what you were talking about re “sheer clamps”. Basically you added what we call an inwale in canoe building. Then attatch your deck and cockpit stringers to that just under your deck. I didn’t approach the problem that way. Perhaps the pictures being sent will explain what I did. Much easier.
Dale
Wednesday, August 26, 2009 – 02:09 PM
Hi Dale,
The Sheer Clamp is very much like a canoe’s inwhale. In many ways it serves the same purpose.
I’m not sure why they’re called “clamps” which seems confusing, except that many pieces are later screwed into them and thus clamped down – decks, frames, rails, trim, etc.. They do add strength as well as provide enough bulk to hold a lot of fasteners. Maybe because the rim of the hull gets “clamped” between this piece and the others? I’m not sure.
Regardless of how this piece got it’s name, it’s a pretty important piece. Like the ridge beam of a roof, it ties everything together, and appears in some form in almost every boat design I’ve ever seen.
And yes, the frames and stringers, or carlins, will attach to them. I think once I start putting it together (Very soon, I hope) and post some photos it will make more sense – some of these things are hard to describe in words.
– Barry
Wednesday, August 26, 2009 – 05:27 PM